Bread Knife FIBRE CARBON 2 26 cm, de Buyer
Code: DB428626

Related products


Product detailed description

DESCRIPTION
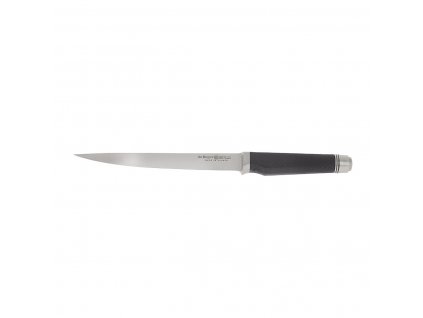
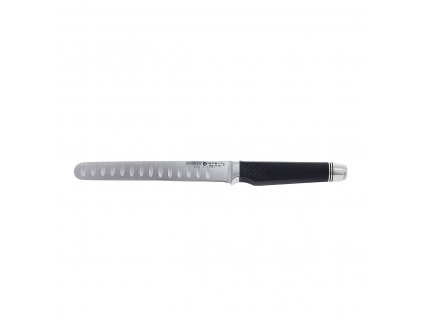
The Fibre Karbon 2 bread and pastry knife by De Buyer features a long serrated blade and is extremely sharp. Due to its saw blade, this knife is ideal for slicing bread and other baked goods. It can handle even hard crusts and cut neat slices without breaking the fluffy crumb.
The blade is made of high quality German stainless steel X50CrMoV15 (special knife steel) with hardness 56 HRC (Rockwell hardness scale). The FK2 series has a unique knife balancing system to suit the needs of the individual chef. Simply unscrew the stainless steel foot on the handle and remove the necessary amount of stainless steel inserts.
The handle of the knife is made by hand by layering carbon fibre. This makes it very durable, strong and brings a nice and comfortable grip for fatigue-free slicing. The shield protects the fingers. The knife rack is ideal for storing your knives safely.
SPECIFICATIONS
Blade length: 40.5 cm
Blade length: 26 cm
Material: special knife steel, carbon fibre (handle)
Colour: silver, black (handle)
ADVANTAGES AND DISADVANTAGES
 |
This bread knife has a serrated blade and is ideal for slicing bread and other baked goods. The blade is extremely sharp. The blade of the knife is made of top quality German stainless steel. Unique system of balancing the knife according to the chef's needs. The shield protects the fingers. Smooth transition between bolster and handle. The ergonomic handle provides a safe, comfortable and pleasant grip for fatigue-free work. The knife is also suitable for professional use. |
PRACTICAL ADVICE
Dishwasher safe: NO
Always wash the knife only in cold water to ensure longer lasting sharpness.
THE DIFFERENCE BETWEEN A SHARPENING STEEL, A HANDHELD SHARPENER AND A SHARPENING STONE.
You use the sharpening steel during regular maintenance - might be before each use of the knife. However, only use a handheld sharpener or a sharpening stone once in a while to restore the knife to its original sharpness, i.e. when the knife is really blunt.
A SHARPENING STEEL
A SHARPENING STEEL is used for regular maintenance of knives. Use the sharpening steel to quickly and easily restore the original sharpness of your knives. Use the sharpening steel to maintain the blade. It is not easy to create a sharp edge on an already blunt knife - in this case, choose a handheld sharpener or a sharpening stone. The sharpening steel has a handle and the grinding part can have a finer or coarser surface. The sharpening steel is not practical for maintaining knives that are too large.
The grinding part of the sharpening steel can be made of different materials - diamond, ceramic, special cutting steel, etc. The length of the sharpening part should be chosen according to the length of the blades of the knives to be sharpened. We have sharpening steels for you with sharpening parts from 20 cm up to 31,5 cm - special butcher's sharpener for sharpening large knives.
Sharpening the knife with a sharpening steel
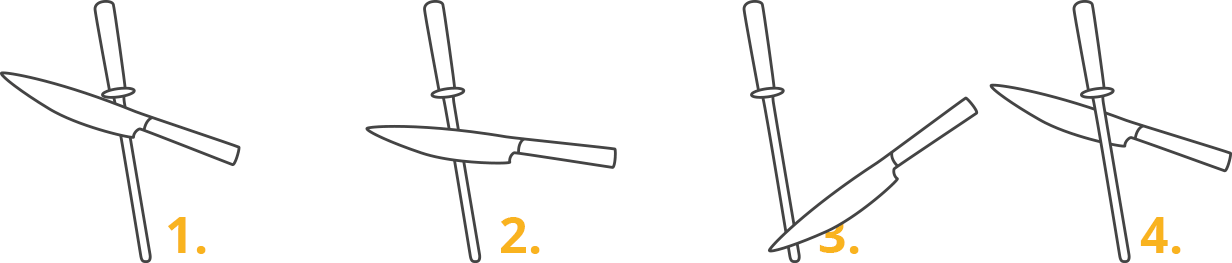
Hold the sharpening steel vertically in one hand and the knife in the other hand (inclined at about 20° to the surface of the sharpener). It's best to have a support (e.g. a table and a towel to keep the sharpener from slipping) to keep the angle the same across the blade and keep the sharpening precise. Working with the sharpening steel requires practice to avoid unwanted teeth on the blade. Pull the knife from heel to tip against the blade and repeat the same from the other side of the blade (20 times on each side). Try to keep the same angle between the knife and the sharpening steel and do not push too hard.
HANDHELD SHARPENER
Handheld sharpener is used to restore the original sharpness of the knife. Unlike the sharpening steel, it can handle even blunt knives. The handheld sharpener contains grinding wheels made of different materials, which you use to stretch the knife. Sharpening knives with the handheld sharpener is so easy and fast. Just run the blade along the entire length of the knife with the grinding wheels a few times and you have a perfectly sharp knife again. You only need to use the handheld sharpener once a month or if the knife is already blunt. A sharpening steel is sufficient for regular maintenance before slicing.
SHARPENING STONE
The knife sharpening stone has a surface with a certain coarseness. There is also a double-grain sharpening stone with one side coarse and the other side fine. The sharpening stone is used to restore the original sharpness of knives - as a handheld sharpener. The sharpening stone must be moistened before use and the knife blades must be placed at the correct angle to it (approximately 12 - 15°).
Knife sharpening with an sharpening stone

Place the blade of the knife on one end of the stone and pull the knife evenly slightly to the right against the blade. Turn the knife and pull in the same way but in the opposite direction. Always swipe the entire length of the blade. However, be careful not to catch the blade on the edge of the sharpening stone. Pull the knife as if you were trying to cut a thin slice from a knife. Do not put too much pressure on the knife. Grind first on a coarser surface and then on a finer surface to smooth the blade and remove burrs.
GRIT OF THE SHARPENING STONE
Choose the grit of the sharpening stone according to the use of the knife. The blade is ground on a grinding stone with a coarser edge , ideal for cutting soft and fibrous ingredients such as vegetables or meat. On finer grinding stones (with less coarseness) you get a smooth edge that is suitable for cutting with pressure rather than pulling, for example when chopping or skinning. The resulting edge depends on the coarseness (grit) of the sharpening stone and the angle at which you sharpen the knife.
The grit (coarseness) of the sharpening stone is given by a number which corresponds to the number of meshes of the sieve per inch (25.4 mm) through which the abrasive still falls during sieving. Thus the larger the number, the denser the screen, and the finer the abrasive. International standards FEPA ( Federation of European Grinding Aid Manufacturers) indicate the grit size see table:
|
Grit size according to FEPA |
Verbal name |
|
7, 8, 10, 12 |
rough |
|
14, 16, 20, 22, 24, 30 |
rough |
|
36, 40, 46, 54, 60 |
medium |
|
70, 80, 90, 100, 120 |
fine |
|
150, 180, 220, 240 |
very fine |
|
280, 320, 400, 500, 600 |
particularly fine |
|
800, 1000, 1200 |
extra fine |

NO KNEAD WHOLEMEAL BREAD
Ingredients
3 cups (708 ml) warm water (not hot), 1 tbsp dried yeast, 1 tbsp sugar, 1 tbsp vegetable oil (eg. sunflower or rapeseed), 1 tbsp vinegar, 3 cups (375 g) plain wheat or plain spelt flour, 2.5 to 3 cups (324 to 389 g) whole wheat flour, 1 to 1.5 tbsp salt, nuts, seeds to taste
Procedure
1. In a large bowl, mix the warm water, yeast and sugar. The water must not be hot, but rather at body temperature so as not to degrade the yeast. Wait a few minutes until you see the yeast is active and forming bubbles on the surface, then add the vinegar and oil.
2. Add the plain flour cup by cup, stirring the dough thoroughly between each cup. Now add the whole wheat flour and salt, again gradually, mixing thoroughly between each addition. This dough will be very thin, mushy and sticky. Add seeds, nuts or whatever you like. You can also try herbs, dried tomatoes, garlic or fried onions.
4. Preheat the oven to 185 °C. Using a spatula, transfer the dough into the bread pan (the dough will make 2 loaves). Sprinkle the surface with more seeds and bake for about 50 minutes, until the bread is golden brown on top. You can also tell that the bread is ready at first glance simply by the fact that it is moving away from the sides of the form and a small gap is appearing around the perimeter. Once you take the bread out of the oven, you can slide it smoothly out onto a wire rack where it cools beautifully without burning. To check if the bread is already baked, knock on the bottom of the bread, it should sound hollow.
Recipe source and recipe image: https://kitchenette.cz/clanek/73-celozrnny-chleb-bez-hneteni
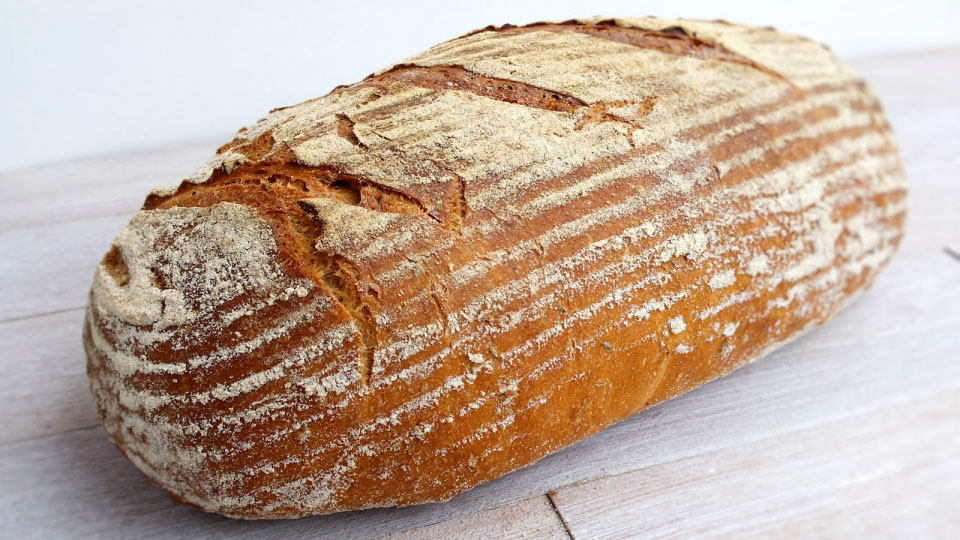
RECIPE FOR HOMEMADE CARAWAY BREAD
lngredience
200 g rye flour (can be whole wheat), 300 g wheat bread flour, 200 g wheat plain flour (can be whole, wheat or spelt), whole cumin (about 15 g), 15 g fresh yeast, 1 tsp sugar (or honey, molasses, ...), 490 ml water (you can try beer, whey), 15 g salt
Procedure
1. Crumble the yeast in the bowl of your food processor . If you don't have a food processor, you will knead the dough by hand. Add the sugar and stir with a fork until it becomes a thin slurry. Mix with water and stir well with a whisk.
2. Next, add everything else from the recipe. Turn the machine on low speed and let it knead for 10 minutes. If using a home baker, let it knead for 30 minutes and then remove the dough.
3. Put the worked and sticky dough ideally in a plastic bowl greased with a teaspoon of oil. If you don't have one with a lid, put the bowl in a plastic bag. Leave at room temperature to rise for one hour. Fold once during this time. This is done by stretching the edges of the dough and folding them into the centre of the dough. Doing it to the man right in the bowl all around.
4. After an hour, oil your line a little and stretch the dough into an approximate square. Fold and tighten to form a cone. Flour the doughnut with rye flour and place the dough cone with the seam facing up. You can leave the dough to rise in a colander lined with a tea towel and flour it. After tipping, the joint will be underneath and will not unravel during baking. Put the dough back into the bag and leave to rise for one hour. After about 20 minutes, turn on the oven with the baking stone and water pan. If you bake on a baking sheet, you can reheat later. The oven must reach a minimum temperature of 250 °C .
5. Carefully tip the risen bread, which has completely filled the loaf pan, onto a planting spade. Dust this with coarse or corn flour. The bread will slide down it better. If you bake on a baking sheet, it is important not to pull it out at all. It cools quickly and the bread would crack around the perimeter. Prepare about 200 ml of hot water from a kettle, a razor blade and a planting shovel. It'll go very quickly now. Especially watch out for the steam!
6. Tip the bread onto a shovel, cut it if you like and quickly slide it onto a stone or baking tray in the oven. Pour water into the bottom tray at the bottom of the oven and quickly close the oven. Set the timer for 15 minutes.
7. Then lower the temperature to 190 - 200 °C . Remove the baking sheet to the water and bake for 30 minutes.
8. Let cool on a wire rack. Don't cut the warm bread! You'd get a shrinkage.
Use the above ingredients to prepare a loaf weighing 1200 g.
Recipe source and recipe image: http://www.pazitka.cz/ostatni/domaci-kminovy-chleba-z-drozdi/

Additional parameters
| Category: | Bread knives |
|---|---|
| Warranty: | 2 years |
| Weight: | 0.28 kg |
| Color: | Black |
| Material: | Stainless steel |
| Size: | 26 cm |
| Blade length: | 26 cm |
| Product type: | Bread knife |
| Collection: | De Buyer Fiber Carbon |
| K překladu: | CZ AUTO-PRO-title |
| Margin: | E |
Be the first who will post an article to this item!